Your kitchen's more afraid of you than you are of it.

Saturday, January 15, 2011

Chicken Tikka Masala

Last night I saw "Green Hornet" and IT WAS AWESOME. I loved it. So much. Cannot wait to get my hands on the DVD. Seth Rogan was perfect. Jay Chou was perfect.

Christoph Waltz? *swoon* Perfect.

My only gripe was their choice of Cameron Diaz as Casey. Her skin looks like fruit leather.
Of course, that's an insult to the fruit leather.

Anyway, go see "Green Hornet" and have a good time. Especially if you were a fan of the original. It was a great homage.

Oh, before I start tonight's recipe, I just want to say thank you to the readers. I know that this blog is still in its fledgling stages, but I have received overwhelming praise and encouragement, friends coming out of the woodwork telling me how much they enjoy reading it, and it makes me so incredibly happy! Thank you, thank you, thank you. I hope I can continue living up to your expectations! 

That being said, I cannot wait to share this with you. I'm going to call it your supermarket's best kept secret. Because, well, I don't really know anyone who knows they exist and they're always kind of tucked away on grocery store shelves.

I give you: McCormick Recipe Inspirations!

These little packets of joy not only provide you with a full-scale recipe, but the exact amount of spices required to complete the dish! For amateur chefs who aren't very knowledgeable regarding their spice rack, this is one of the most useful tools. You don't have to spend extra cash on a bottle of spices you might not use again, especially if you discover you don't like them. It allows you to broaden your tastes a little. If you've never had cumin or you don't know how to use fennel, here's a tablespoon! The spice packs usually run about $2 and can be found in the spice aisle.

The moneymaker is the recipe card. It pulls right off the back of the spice packet, providing you with the list of spices and the list of grocery store item you need, so you can use it again and again. The funny thing is, a lot of the spices that are used in most of these recipes I do own - what I just really want is the card! It's like a little cheat-sheet!

If you're a little more advanced and even more adventurous, you might already have some of these spices at hand, and/or willing to go purchase what you don't.

Chicken Tikka Masala is an Indian curry dish that has disputed origins. Some say that the dish originated in Punjab. Others say it originated in London. I have even heard that it was created in India to appeal to British tastes during the Empire. There is also one story that claims an Indian chef living in Glasgow, Scotland invented it in the 1970s. It apparently is so popular in the UK that in 2002, Foreign Secretary Robin Cook declared chicken tikka masala to be "Britain's true national dish"! According to a survey done by the BBC in 2007, it has FORTY EIGHT different variations! (Source: BBC News E-Cyclopedia) The only common ingredient in these 48 variations? Chicken!

CHICKEN TIKKA MASALA, courtesy of McCormick Recipe Inspirations
Serves: 6
YOU WILL NEED:
2 tbsp butter
1 1/2 lbs. boneless, skinless chicken breasts, cut into 1-inch pieces
1 medium onion, chopped
2 tbsp lemon juice
1 (14.5oz) can diced tomatoes, undraind
1/3 cup heavy cream
1 tbsp cornstarch
1/2 tsp salt
2 tsp paprika*
1 tsp dried minced garlic*
1 tsp garam masala*
1/2 tsp ground cumin*
1/2 tsp crushed red pepper* (optional)
*included in spice pack

Garam masala (which means, literally, "hot mixture" in Hindi) is a blend of spices that are common in Indian cuisine, which include but are not limited to coriander, black pepper, cumin, cardamom, cinnamon, and so much more!

Traditionally, you serve this dish with rice and/or Naan bread. I've kind of OD'ed on rice lately, so I'm changing things up a bit, mixing cuisines and serving it over couscous and also preparing a salad. I plan on making a plain couscous so as not to disrupt the flavor of the sauce.
Mise en Place
You will also need a very large skillet. I thought my 10" skillet wouldn't be big enough but it actually was! YAY!

LET'S COOK!

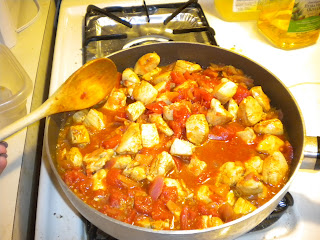
1. Melt the butter in a large nonstick skillet on medium heat. Add the chicken, onion and lemon juice; cook and stir 10 minutes or until chicken is no longer pink. Add all the spices except the red pepper. Cook and stir for 1 minute.
 

2. Stir in tomatoes until well mixed.


3. Stir cream into cornstarch and salt until smooth. Gradually stir into skillet.

4. Stir in red pepper to taste, if desired (I do so desire!). Bring to boil. Reduce heat to low; stirring frequently. Simmer 5 minutes or until slightly thickened.

5. Serve with cooked rice, cous cous and/or Naan bread, if desired.


Final verdict? OH. MY. GOD. This dish was just ... it was so ... oh my God ... so good. So delicious. Seriously, if someone was walking by our apartment and could only hear what was going on inside, it probably sounded like we were either having an orgy or eating something mind-blowingly delicious. In this case, it was the latter.

The sauce was creamy and flavorful. The chicken was juicy. The onions retained a little crunch. It wasn't even too spicy! I think this has to be one of my favorite things I have ever cooked, hands down, no contest. I have filed this recipe away for future usage.

Next week I don't know, as always. I will be sharing my (or my Mom's) meat loaf recipe, which is an instant hit here. We devour it at least twice monthly because it is easy, delicious and irresistible, and the leftovers are a plus. But otherwise, I have no clue. Tonight I'm making a project out of going through all of my cookbooks and my collection of computer printout recipes and trying to determine what I could make not only for myself but to feature on the blog. So keep your eyes open for new and interesting dishes!

Hope you all enjoy your 3-day weekend! 

Thursday, January 13, 2011

Pasta Puttanesca

Guys, I'm going to admit something. It might come as a bit of a shock, but I feel like I can't keep it a secret any longer. I....

I love pasta. I really love pasta. I could probably eat pasta every day, all day, for breakfast and lunch and dinner. I love linguine, I love bowties, I love shells. I love angel hair and ziti and orzo and fiore. I love pasta. Pasta is like the blank card of foods. You can make anything in the world using pasta and it will be delicious. Seriously. I have a cookbook called "365 Ways to Cook Pasta", by Marie Simmons, and one day I will try every single recipe in the book.
Oh yeah, this is happening for real

This recipe is not exactly from this book, it's from a website, but the two have only slight differences. The one in the book uses anchovies and oregano; this one I'm making uses sugar and chopped onion. Either way, they both rely on capers, black olives and crushed red pepper for bold flavor.

I've been absolutely dying to try this Pasta Puttanesca, and I'm super excited. If the name sounds dirty, it's because it kind of is. "Puttanesca" comes from the Italian word puttana, meaning prostitute or whore. So this dish, which is also sometimes called Pasta (or Spaghetti) alla Puttanesca means "pasta in the style of the prostitute" or "pasta the way prostitute would make it" or any variation thereof. Why is it called this? There doesn't seem to be any definite reason. I've heard that this spicy meal was made by prostitutes to lure in potential customers, or that the dish was popular with prostitutes as a "fast snack" between entertaining clients. I've also heard that the strong, gutsy smells of the dish made it smell "like a whore".

Well, now that I've put that image into your head, let's get cooking.

PASTA PUTTANESCA, courtesy of TheNest.com
YOU WILL NEED:
1 1/2 tbsp olive oil
1 cup chopped onion
3 cloves garlic
1 (14.5 oz) can whole peeled tomatoes, undrained
1/2 cup water
1/3 cup chopped oil-marinated sun-dried tomatoes
1/4 cup tomato paste
1 1/2 tsp sugar
1/8 tsp crushed red pepper
1 (5.75 ox) can pitted black olives, drained and chopped
1/2 cup chopped fresh parsley
1 tbsp chopped capers
8-12 oz pasta (spaghetti, thin spaghetti or linguine)

Mise-en-place!
You will also need at least a 2-quart saucepan. In terms of the recipe itself, I made zero substitutions on this recipe; it was perfect just the way it was! Well, for me, at least! Let's cook!

1. In a 2 quart saucepan, heat the oil over medium-high heat. Add the onion and garlic; cook, stirring, until softened, for about two minutes.
 
2. Add the whole tomatoes, with liquid, then break them up with the back of a spoon.

3. Stir in the water, sun-dried tomatoes, tomato paste, sugar and red pepper flakes. Bring to a boil.

4. Reduce heat and simmer, uncovered, for 30 minutes or until thickened, stirring occasionally. Stir in the olives, parsley, and capers; cook until heated through for 2 minutes or longer.

5. Cook the pasta according to directions. Drain and serve tossed in sauce!


Mmmmmm!!! Spicy and delicious!!! I do love a good spicy dish every once and awhile. This has probably been one of my favorites. The chunky sauce made it a bigger meal than I thought. I was totally stuffed when all was said and done, and then Fiance did the dishes for me! Even better than dessert! Which, by the way, was half of a dark chocolate Milky Way bar.

Tomorrow, the two of us will not be home because we got some important, grown-up stuff to do. We didn't get snowed in by the way; our apartment complex was totally taken care of, and I'm pretty sure they didn't even close schools in our area. In any case, dinner will most likely not be an event.

Friday night I won't be cooking either because - wait for it - we're going to see The Green Hornet! HELL TO THE YES. One Seth-Rogan-and-Christoph-Waltz sandwich, please! We were going to get tickets for the midnight showing on Thursday night but the only one we could find within 30 miles of us was only showing it in 3-D and I have grown to dislike 3-D. It just doesn't really seem worth the extra money. Anyway, Fiance doesn't get out of work until 8, and the earliest showing we could see was after 9pm.

So this means that Saturday night will be the night for Chicken Tikka Masala - an Indian dish that I have been dying to cook for myself and finally found a simple enough recipe for. Excited? You bet your basmati!

See you then, eaters and readers!

Tuesday, January 11, 2011

Greek Salad Pizza

I was going to whip up this dish last night, but I was still feeling icky from eating so much fondue. It's not that it was bad fondue, because it totally wasn't, I just ate waaaaay too much of it. I had a stomachache almost all day on Monday and eating a delectable, greasy diner breakfast sure as hell didn't help my cause. So last night I just took it easy and made a salad for dinner.

But tonight I am going to prepare the Greek Salad Pizza. I found this recipe when I decided to try some vegetarian dishes. I noticed we weren't getting enough veggies in our diet.

At first glance, you might look at this recipe and think, there is NO WAY this is a filling meal. But I beg to differ. This is a simple weeknight meal that is thrown together in a matter of minutes. I'll admit that I got a bit of a late start because I was too distracted by the "Green Hornet" marathon that's been on the SyFy channel all day.

Has anyone been watching that?! I've been catching episodes here and there and it took me right back to my childhood. I remember my parents always getting super excited when it was on TV, and I love a good kick ass hero show. Also, Bruce Lee was the man!

No, District Attorney Frank P. Scanlon, you're the man! 

I'm pretty stoked for the movie come out on Friday. I might have to go see that ASAP - if I'm not snowed in of course. They're predicting 12" of snow by me!

Okay, let's roll Kato...

GREEK SALAD PIZZA, courtesy of Allrecipes.com
YOU WILL NEED:
1 (8oz) can of Pillsbury refrigerated crescent dinner rolls
3/4 tsp finely chopped fresh rosemary leaves
1/4 tsp kosher salt
2/3 cup plain hummus
1 cup crumbled feta cheese
1 cup grape tomatoes, halved
1/2 cup Greek olives, halved
3 slices of red onion, quartered
1 tablespoon olive oil


You will also need a 15x10 baking pan and a rolling pin, if you have one. The only adjustment I made to this recipe was I used my favorite Greek olive hummus instead of plain.

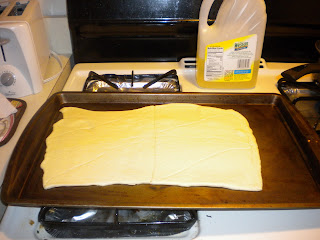
1. Unroll the dough and press into an ungreased pan; press perforations to seal (here's where the rolling pin would come in handy!). Sprinkle with rosemary and salt. Bake at 375 degrees F for 8-10 minutes or until lightly browned.

2. Spread hummus over the crust (using a rubber spatula makes this step a breeze).

3. Top with cheese, tomatoes, olives and onion. Drizzle with oil.

4. Cut and serve!

Easy, sure to please, and overall healthy. The crescent rolls make for a crispy, flaky crust. This is a good recipe to make if you need something fast and filling and you don't have the energy to whip up an entire meal. It could also serve well as a lunch recipe, especially if you're entertaining.

To be honest, the crescent rolls work so well as a crust that you could probably make any type of pizza using this. Actually .... challenge accepted. I'm going to try it one day. I'll let you know how that turns out.

I know it's a supershort blog tonight but it was a supershort recipe! Coming up this week, I have Chicken Tikka Masala and Pasta Puttanesca - both of which are way easier than they sound - as well as reveal one of your supermarket's best kept secrets. I was also planning on making a slow-cooker salmon recipe, but salmon was almost $10 a pound at my supermarket. Way too expensive. I'll wait for the price to come down before attempting it. But these other two recipes coming up are new for me and I am so excited about trying them; I hope you're excited about seeing them!

For all you New York and New Jersey residents who are gearing up for snow, stay safe! I know for a fact I won't be able to go anywhere tomorrow and the day will be spent Rock Banding, especially since Fiance has the day off. Everyone else, I'll see you on the internet!

To the Black Beauty, Kato!

Thursday, January 6, 2011

Parmesan-Dijon Chicken

As much as I am learning to love cooking, I have to say, taking a "night off" last night felt pretty damn good. We polished off the French pot roast and I made a big fat salad with tomatoes, red onion and sliced hard boiled egg (using the egg slicer from Fiance's mom! Isn't it cute?)


Then we stayed up until almost two in the morning playing Rock Band. I'm slowly getting better at slappin' da bass, and hit my first 100% on "Fat Bottomed Girls"! I had to do a victory lap around the apartment.


Lego Rock Band Freddie Mercury approves.
But now that the fridge is nearly empty, I've got to get back on the horse so we can, you know, sustain ourselves. Tonight, I wanted something easy and delicious, but something very different. So I clicked around on the web until I found tonight's recipe.

I have a few go-to recipe websites that I turn to in my times of need... thenest.com or allrecipes.com, for example ... but my mom (who else?) introduced me to Betty Crocker's website. I have to hand it to their web developers; they made a very well-organized website. It's never hard to find anything on there, and their search engines (unlike some too-rigid recipe sites) are complacent.

When Leslie came over on Saturday to make us dinner, she left us a package of boneless skinless chicken breasts - perhaps one of my most favorite and versatile items to cook with. I needed to use them tonight before they went bad, so I went on the Betty Crocker website and searched for easy meals using the BLSL (boneless/skinless) chicken. My only criteria was, I wanted to use everything I already had in my own kitchen - or only have to go out and buy one item. I stumbled across this recipe for Parmesan-Dijon Chicken and was sold. Everything for this recipe was already in my pantry or fridge and it sounded delicious.

YOU WILL NEED:
1/4 cup of butter or margarine, melted
2 tablespoons of Dijon mustard
3/4 cup dry bread crumbs
1/4 cup grated Parmesan cheese
6 boneless skinless chicken breast halves (1 3/4 pounds)

As far as equipment goes, you will also be needing a shallow dish, a large plastic zip-close bag and a 9x13 serving pan.

Surprisingly small mise-en-place!
For my version of this recipe, I will be using Panko breadcrumbs - perhaps the best breadcrumbs ever. They're Japanese breadcrumbs usually used for frying, and they are coarser and flatter than what we use here in the States, making for a crunchier crunch.
On the left: regular bread crumbs. On the right: Panko
Also, I'm going to use a four-cheese blend instead of straight Parmesan. On the side I will be making frozen peas and jasmine rice.

Jasmine rice is one of my favorite side dishes. I had gallbladder removal surgery in May of last year and jasmine rice was one of the few foods I could eat post-op. After five days of nothing but Jell-O (that is not an exaggeration), jasmine rice was a welcomed change.


If you don't know what it is, jasmine rice a white sticky rice from Thailand, also called "fragrant rice" or "scented rice"  It doesn't smell exactly like jasmine, but it's still a pretty yummy scent. It is a staple food in Thai cuisine, high in fiber, and is a source of iron, protein, calcium, vitamins B1 and B2, phosphorous and a nifty little compound called niacin (source: Bangkok Companies).

To be quite honest, I out of all of those, I had never heard of niacin, so I decided to look it up. Turns out, niacin is a B-complex vitamin, used to reduce the amount of cholesterol and "fatty substances" in your blood. It's also used to treat a deficiency disease known as pellagra. Fancy that! (source: PubMed Health)

Well, enough about the mystical properties of jasmine rice, let's get cooking.

1. Heat oven to 375. Mix melted butter and mustard in a shallow dish until well-mixed. Mix the bread crumbs and cheese in a large plastic bag (I added thyme and oregano to my breadcrumbs mixture).

2. Dip one piece of chicken at a time into the butter mixture, coating all sides. Then place in bag of bread crumbs, seal bag, and shake to coat. 

3. Place chicken in single layer in ungreased 9x13 pan


4. Bake uncovered 20-30 minutes, turning once, until the juice of the chicken is no longer pink when centers of the thickest pieces are cut.

5. Serve and enjoy!

That was by far one of the easiest quick meals I've ever done and it took so little effort! There were so few ingredients and it came out phenomenal. My only gripe was my own fault. I forgot to turn the chicken halfway through, so the bottom Panko crumbs were a bit mushy. This is a dish I will definitely be making again (next time remembering to turn the chicken).

I have NO CLUE what's on next week's docket. All I know is that on Sunday I'm getting together with a group of old friends for some good old-fashioned fondue. Sometime over the weekend though I gotta go food shopping and prepare for another week's worth of dinners to present to you. I have some old favorites and stand-bys I'm looking forward to sharing, as well as trying out some great new recipes!

Until next time, you hot stuffs you ;-)


Tuesday, January 4, 2011

English-Style Fish & Chips!

Good evening, mates! Tonight we're going on the razzle and cooking up something scrummy! You might be au fait with this one, and it comes from my favourite country in the world!

Aaaaah, England! Also known as John Bull! Or Old Blighty! Or the Little Continent! Or Albion! A beautiful, culture-rich island, home of...
London Bridge!
Stonehenge!

Cranky monarchs!

The Sex Pistols!
Eddie Izzard!

Big Ben!
Neil Gaiman! (grrrrrowl!)

Harry Potter!


aaaaaaaaaaaand one of my favoritest favorite foods ever: Fish & Chips!

I'm so excited I might cry. Just warning you. I tend to get excited about a lot of recipes, but this one tops the list.

I went to England for ten days in 2005 - two teacher-chaperons, nineteen high school students and one British tour guide. It was a beautiful, meaningful learning experience, ample with history. I also searched almost the entire time for a Fish & Chip Shop. When I finally found one on the grounds of Castle Warwick, on my sixth (?) day there, I almost dropped to my knees in awe. I spotted it in the distance and practically ran towards it. I ordered a basket from a blue-eyed British teenage boy in a red apron and wolfed it down at a picnic table before it had a chance to cool down. It was not one of my proudest moments, but they give you tiny packets of malt vinegar, for goodness sake!

My mom made some damn good fish and chips, but now that I'm living on my own, I'm left to my own devices, right? Like everything else. So, cravings took me shopping one day and I gathered up all the ingredients necessary to cook up my own English-style fish & chips.

Now, most people snub their noses at English cuisine and a lot of jokes are made at its expense, and I'm here to tell you as an Anglophile and a foodie, that most of it is false. I could not get enough of English food when I was there, and it was also the only time I've ever enjoyed beer (they serve it at room temperature). I inhaled pasties and baguettes and scones with clotted cream. My only gripe that I can remember was that they love salt (also, their pizza sucks - don't worry, I didn't seek it out; the tour guide took our group to a pizza place in London and I was less than impressed. If it were up to me, I would have found a place where we could get shepherd's pie).

This recipe comes from the Food Network's website, courtesy of Tyler Florence, but I slightly modified it to make it more accessible and easy to follow.

Check out this wicked mise-en-place:
Missing from photo: potatoes
The reason why, the Yukon gold potatoes were currently in a bowl of cold water in the refrigerator, already sliced into quarters and ready to go. One of the best pieces of cooking advice I have received (or can give) is, if you're planning on roasting or frying potatoes, slice/cut them up and give them an ice-water bath. The longer you leave your potatoes in cold water, the crispier they will be. Why? Because cold water draws out the starch, making for crunchier, tastier and healthier potatoes (healthier especially if you don't peel the potatoes - most the nutrients are in the skin).

YOU WILL NEED...
Vegetable oil (for frying)
4 large russet potatoes  
2 cups all-purpose flour
1 tbsp baking powder
1 teaspoon salt (plus more for seasoning)
1/2 tsp freshly ground black pepper (plus more for seasoning)
1 large egg, lightly beaten
1 (12 oz) can of soda water
1/2 cup cornstarch, for dredgin
1 (8 oz) cod or haddock fillets, cut in half on an angle
Malt vinegar, for serving

A few notes before I get into the recipe: instead of russet potatoes, I used Yukon gold (as mentioned above). You could also use small red potatoes as well. Also, the recipe originally calls for rice flour, but cornstarch is a cheaper alternative. Finally, you do not have to use haddock or cod. For this recipe, I used catfish. Any flaky white fish - swai or sole, for example - will work for this recipe. It's a matter of taste.

Alright. Let's goooooooooooo.

1. In a large mixing bowl, combine flour, baking powder, salt, pepper, and egg. Pour in the soda water and whisk to a smooth batter (it will be thick!)

2. Spread cornstarch on a plate. Dredge the fish pieces in the cornstarch and then dip them in the batter, letting the excess drip off  (I highly recommend spreading a towel underneath your workspace. It makes for easier cleanup)

3. Heat 3 inches of vegetable oil in a deep pot. When it's hot (about 325 degrees), put the potatoes in the oil. Fry the chips for 2 to 3 minutes; they should not be fully cooked or crisp at this point. Remove the chips with a spider strainer or a slotted spoon, to a paper towel-lined platter to drain (It's easier to do this in medium-sized batches)

 4. Once the potatoes are drained of excess oil, carefully submerge them again into the hot oil. Carefully wave the battered fish into the bubbling oil before dropping them in on top of the chips (that means, lower them in SLOWLY and CAREFULLY, don't just drop them in)
I did get splattered =(


5. Fry the fish and chips for 4 to 5 minutes, until crispy and brown. Remove with a slotted spoon and drain the fish and chips on paper towels. Season lightly with salt.

6. Serve with malt vinegar and/or tartar sauce!

And there you go! English-style fish and chips, easy and delicious. Flaky, crunchy catfish with salty crispy chips and tangy sweet malt vinegar to top it off. British cuisine at its finest! I had very little snafus with this dish - except a gnarly oil burn on my forearm. I was lowering potatoes from the slotted spoon into the oil, and one of them toppled off, splashing hot oil up onto my skin. Fun! Also, really remember to shake off the excess batter. I don't think I did it as well as I thought and the skin was just a bit too mushy. Otherwise, it was yet another belly-filling meal!


Well, you won't hear from me tomorrow night, as we have to clean out the refrigerator (read: leftovers for dinner), but I hope you've been having fun with these recipes so far!

Cheerio and the best of British in your own kitchen, chums!
Anarchy in the UK!